Showing posts with label Make Something Monday. Show all posts

Monday, December 17, 2012

Make Something Monday: Christmas Canvas

I have all my Christmas decorations up except for the stockings. I have to whip out some adorable, homemade stockings for the whole fam in the next couple of days. You know, no big deal.

I did finish one of my Christmas projects, though. And since I hung them up today, and today just happens to be Monday, I thought it was a great time to revisit Make Something Monday!


This is a really easy project. I made a canvas for my SIL last year for Christmas, so I knew basically what I was doing. Last time I painted the canvas and then cut letters out of contact paper and painted over the whole thing a different color. The top color bled some and I ended up having to fix all the edges with a tiny paintbrush. There is a similar project floating around on pinterest that suggests using vinyl letters from a kit for science projects, etc. Doing the letters took forever last time, so I picked up a pack of the vinyl letters to try. The letters on the pinterest project bled too, which just bugs me, so I knew I needed to come up with a way to prevent that.

When I painted the stripe on the wall in Graham's room I painted over the tape with my base wall color first. That way anything that would bleed through the tape edge would be the base wall color. After that dried, I painted the stripe and the edge was perfectly sharp! I knew that concept would work here too. I painted the whole canvas white, taped off my star and stuck on my letters, painted over all edges white again, then spray painted the whole canvas blue. When it dried, I peeled off the tape/letters and voila!


They turned out just as I had hoped. That doesn't always happen.


Monday, April 30, 2012

Make Something Monday: Sports Fan Gear for Girls

OK, confession time. I made this a lllloooonnnnggg time ago and just never posted it. Of course, you didn't know that until I told you, but for the sake of being honest, I had to share.

A friend of mine is a HUGE Dallas Cowboys fan. She has a little girl who unfortunately has spent most of her almost two years without much hair. It doesn't help that the hair she does have is white-blond, so most of her wisps went unnoticed for far too long. All this say, wearing sports fan gear didn't help her look any more girly. So, I wanted to help a girl out. Plus, it gave me an excuse to try a couple new crafty things.

First I freezer paper stenciled the Cowboys star onto the front of a onesie. I know it's not official sanctioned team clothing, but this wasn't for sale. It turned out really cute, so I made one for my boy too. I love freezer paper stenciling. It's really simple and fast (well, depending on how intricate my design is). It would be a lot easier if I had a fancy machine that cut everything out for me, but where's the challenge in that, right?

Next I attempted ruffles on the back. Since I had never made ruffles before, I was in new territory. I decided to use ribbon instead of fabric since I thought that might be easier. I followed some instructions I found online (sorry, I can't remember where) and it wasn't too difficult actually. They turned out pretty well. The hardest part was keeping the ribbon gathered as I stitched them onto the shirt. They certainly aren't perfect, but no one will notice since they'll be more focused on the cutie sporting the ruffles anyway. Don't look too closely, but now that I've done them once, I'm not so freaked out to try them again.

Sadly, I don't have a picture of Little Miss in her cute football watching outfit, but you can imagine how adorable she looked. Maybe I'll make another for our Baby Girl Miller. I know her daddy would love to see his little girl in Cowboys gear. I'll probably have to make her a Broncos one too, just to keep things even.


Monday, March 5, 2012

Make Something Monday: Paint by Number

It's that time again. Make Something Monday. Remember when I had a bunch of things lined up to share in this "regular" blog installment? Then remember when I dropped off the face of the earth and never posted any of them? Well, I'm back. At least today.

Quite a while ago I saw this blog post about turning a thrift store picture into a paint-by-number masterpiece. Paint by number is that kitschy, vintagey, fun kind of art that adds a little surprise to an otherwise more sophisticated collection. (Ok, let's be honest, I don't have a sophisticated art collection, but I do have a collection, and I thought something quirky would be fun. You know, as if I needed more quirky in my house because the bird print chair and zebra lampshade isn't enough.)

I've mentioned before that I frequent a thrift store called Tuesday House and I knew the frame section would be the perfect place to look for a floral print that might be good for a paint-by-number transformation. Sure enough, I scored this little beauty for $0.50. I thought that was a good amount to pay for something that may or may not turn out.

A sweet little picture, right? It's a print or transfer on a board and I kind of liked it as it was. It's important to like what you start with, at least a little bit. I had to mix a lot of the colors myself, and I was definitely winging it, but I think it turned out pretty well. I didn't do anything to the background for a couple reasons: 1. I wasn't really sure how to tackle it--the whole thing or just parts? 2. Painting around all the flowers, leaves, etc. was way too much work. 3. I thought the shadow might look too overpowering and dark if I made it a solid color.

Ta-da! Sketchy drawing transformed into paint-by-number!

The original picture had a smooth and shiny finish but most of my craft paint is not glossy, so my last step was to do a quick coating of Modge Podge over the whole thing to create an even glossy finish. I used a wider brush that would leave brush strokes too. I thought that would give it some character and subtle texture. You can't see any of that in the photo, but you can see it up close. 

Overall, this was an easy project that I could do here and there. It gave me a good creative outlet without  being a major undertaking. Here's another shot of the final product, just for fun. 

Now I just need to find a place to hang this lovely work of art. 


Monday, September 5, 2011

Make Something Monday: Freezer Paper T-Shirts

I'd love to be consistent enough in my projects to keep up a weekly post about them. Of course, there is more to my life than just bringing my ideas to completion, so I'm not going to commit. I do have a few things in the coffer, (yep, I just used the word coffer) so we'll keep it up for a little while.

My niece just turned six. She's in first grade and has more toys than a lot of kids dream of having. For her birthday I wanted to give her something fun that she could wear to school.

I've been experimenting with fabric paint this summer, which I know sounds kind of scary. I was a little nervous at first too. My last venture into fabric paint was 1985 and I was decorating a pair of Keds. Ok, maybe that's an exaggeration, but it was the 80's and puffy paint t-shirts were sort-of popular. (I'll admit, I wore one of my t-shirt paint creations as a PE shirt for part of middle school. There may or may not have been a teddy bear on it.) But the fabric paint I've been using is nothing like that. I guess it's the same stuff, but the way I'm using it is VERY different. There is a technique of making fabric stencils using freezer paper. (There's a great tutorial here.) So far I've made Graham a shirt for watching the Dallas Cowboys and shirt for watching the Denver Broncos.

It's a really easy project, and I'm kind of addicted. I decided to give my niece something with a graphic picture and maybe add a little fabric for something different. Ohh, look at me trying something new! I picked an owl since they are popular right now and planned for my little owl friend to perch on a pretty, little branch.


There were a few flaws in the stencil, but it adds to the charm, right? Plus, even stuff you buy at the store isn't perfect all the time. I did sew around the edge of the branch to make it look a little more professional. I really like how it turned out.

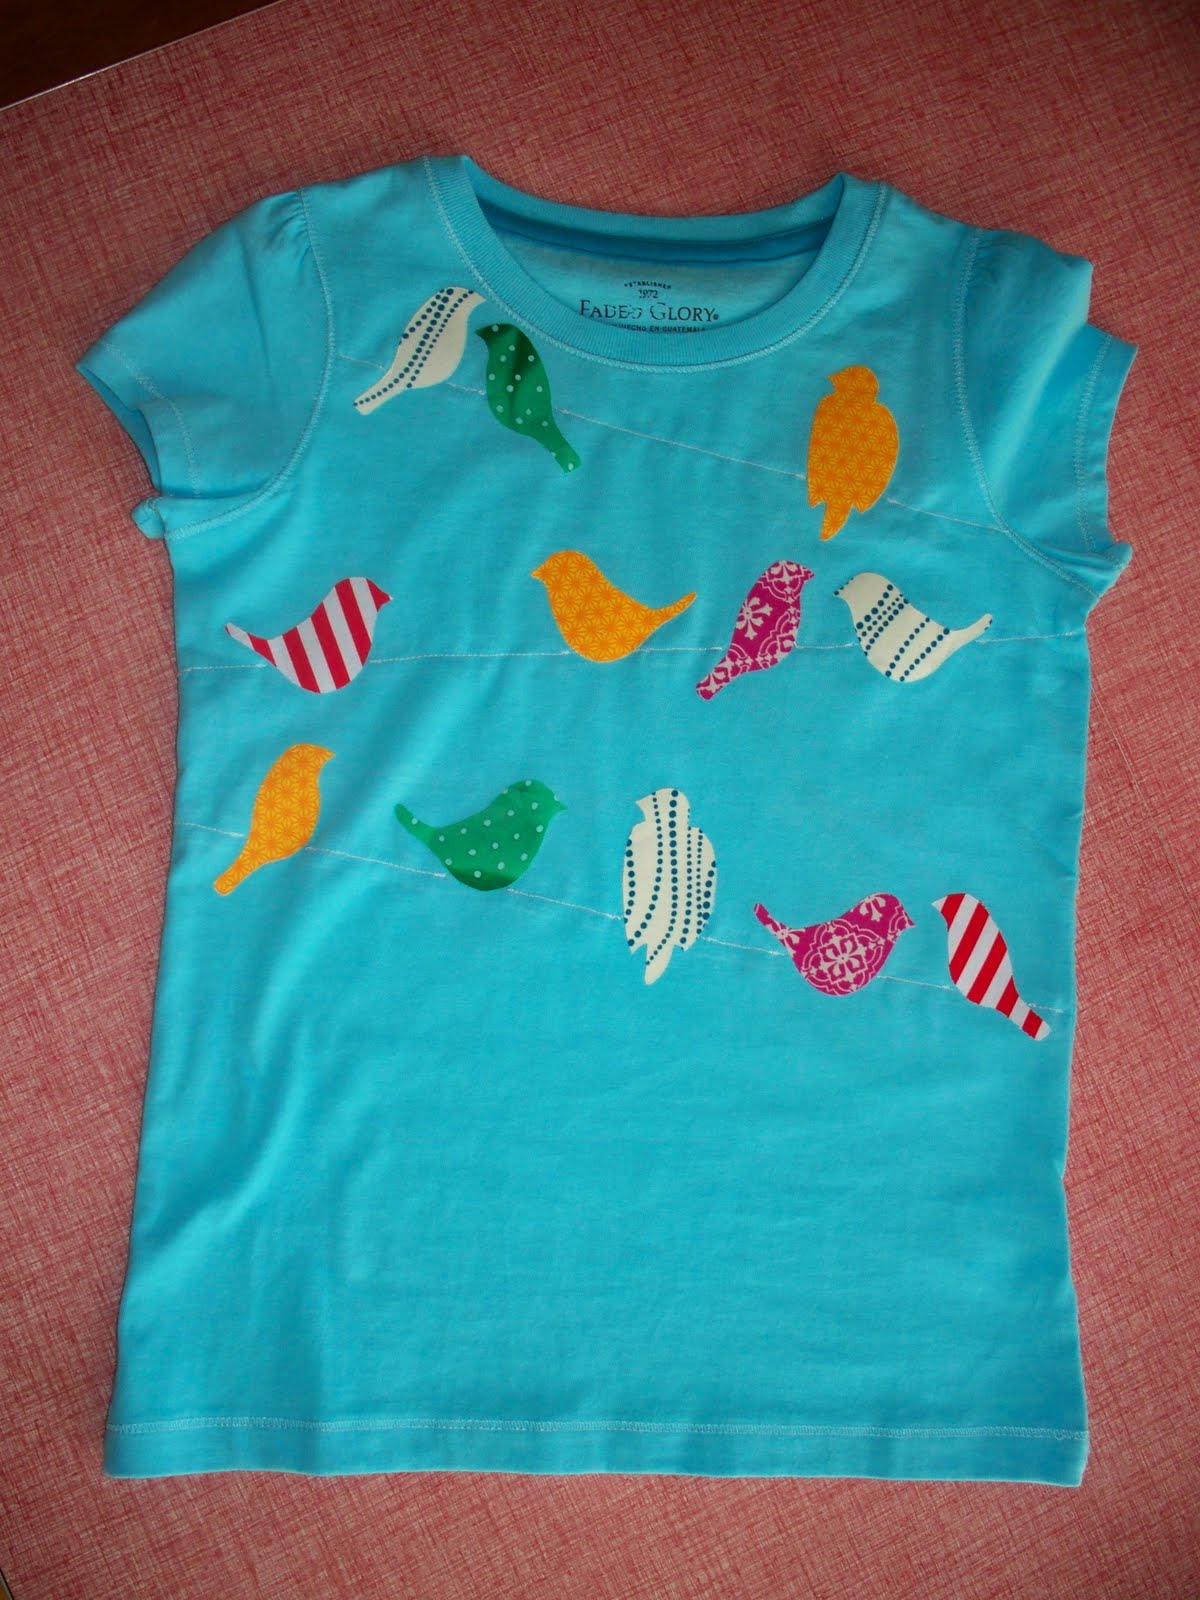
Who needs just one shirt? Certainly not a stylish little girl! So I made her another one. I saw this pillow on pinterest and thought it was cute.

I drew a few little birdies and cut them out as a pattern, ironed on my Wonder-Under, and soon I had a happy little flock. I stitched a wire perch for them and debated sewing around each one, but in the end I opted to leave them as they were. The little birds would have been more secure through washing and drying if I had stitched around them, but my sewing skills aren't that great. And after sewing the branch on the other shirt, I wasn't willing to tackle 12 tiny birds. The final product is pretty adorable, if you ask me.


It's been fun working on a few projects here and there. I love being able to share them with others, and it's fun to make things for a little girl.

So...it's Monday, go make something!